Showing posts with label gifts. Show all posts

Friday, April 24, 2009

Paulette: A Sweet Final Week

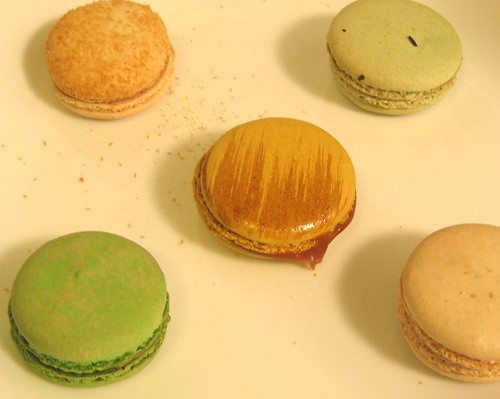
(From top left: coconut, jasmine tea, caramel, pistachio, vanilla)

Like many other bakers, I jumped on the French macaron bandwagon a few years back and it has become di rigueur for me to order these tiny meringue sandwiches whenever saw them sold. In terms of LA, I’ve managed to hit up most of the macaron places – from Jin’s to the Little Next Door. But weeks away from my last day in LA and I still hadn’t visited the no-longer-so-new macaron “boutique” – Paulette – in Beverly Hills.

Well, thank God I have great friends who know me :D The beautiful Sunny called me down from the apartment and surprised me with a small baggie of Paulette’s macaroons. I LURVE her. And of course, she knew my flavor preferences so the bag included my staple macaron trio of (Madagascar) vanilla, (Sicilian) pistachio and caramel. On top of that, the Sun got me the coconut (my favorite favorite dessert flavor) and jasmine tea.

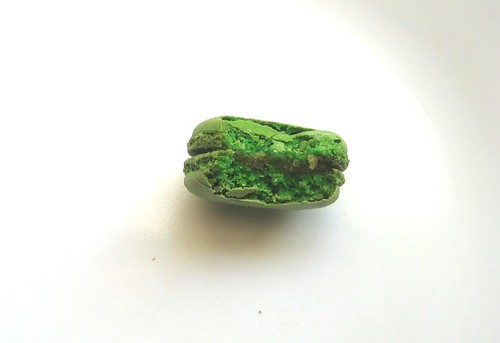
(Innards of the pistachio)

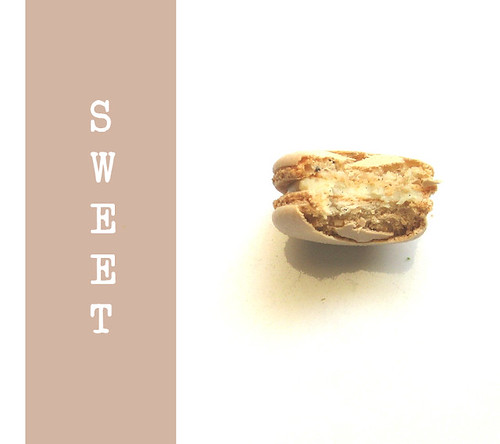
The Paulette macarons were almost too pretty to eat. I took a million photos of those babies from every angle imaginable. I probably have more photos of the macarons than I will of my future children. When I finally got over their prettiness, I took my first Paulette bite. Mmmm…sweeeeet sweet goodness. Unlike the dry, crunchy “biscuit” I had at Little Next Door, the meringue shells at Paulette were chewy and light, though not as well made as Jin’s or Bouchon’s. Paulette did really well, however, with bringing out the flavors of the macarons. The jasmine tea was mild but fragrant and smelled like flowers. They used actual caramel instead of caramel ganache in the caramel macaron which gave it an interesting flavor. It doubled the chewiness of the sandwich and personally, I quite liked that. The pistachio had a very strong nutty flavor. Awesome. But my absolute favorite was the coconut macaron. It was sooooo effin’ good. It was a bite of pure, satisfying coconut-ness. If I could, I would go back and order a box only in that flavor.


FOOD: 4/5
SERVICE: n/a (didn’t go myself but Sunny said the service wasn’t pleasant and the macaron samples were dry)
ATMOSPHERE: n/a (but I’ve seen photos and it looks tres cute <3!)

PAULETTE ($/$$)
9466 Charleville Blvd at Beverly Drive.
Los Angeles, CA 90210
(310) 275-0023
http://www.paulettemacarons.com

Friday, April 3, 2009

Homemade Marshmallows: How to Say "I Love You"

Spring puts me in the candy-making mood and since I have a bunch of ingredients I need to use up before I leave, I decided to make a (large) batch of marshmallows. These fluffy concoctions are insanely easy to make, albeit a little messy. Whip up a batch for yourself, dunk them in melted chocolate and box them up for the ones you love. Because sometimes, nothing says “I love you” more than a carton of fluffy sweetness


MARSHMALLOWS
(makes approx. 4 dozen bite-size squares)


Non-stick spray
¼ cup icing sugar
¼ cup cornstarch

3 envelopes unflavored gelatin
1 cup cold water
1 ½ cup granulated sugar
1 cup light corn syrup
1 tsp vanilla extract
Pinch of salt

Combine icing sugar and cornstarch. Spray a 9 x 9 baking pan with non-stick spray. Sift about a quarter of the sugar and cornstarch mixture over the pan. Shake the tray so that the mixture coats the pan evenly. Shake off any excess and set aside.

Combine the gelatin and ½ cup of the cold water in a large bowl. Set aside. Combine the remaining water with the sugar, salt and corn syrup in a saucepan. Cover and cook over medium heat for about 4 minutes. Remove lid and continue to cook until the mixture reaches approximately 240°F then remove from heat immediately.

Pour heated mixture slowly into the gelatin mixture. Whisk the mixture with an electrical mixer on low speed. Slowly increase the mixer speed to high and whisk for roughly 12 to 15 minutes until the mixture triples in volume and becomes really thick. Add the vanilla near the end of whisking.

Pour the thickened mixture into the prepared pan and spread it out evenly with a spatula. Dust the top of the mixture with some of the leftover sugar-cornstarch mixture. Leave the mixture to set in the pan for at least 4 hours or overnight.

When the mixture has set completely, cut into small squares with a well-oiled knife or cut into desired shapes with an oiled cutter.

Dust marshmallows with more of the sugar-cornstarch mixture. OR, if you want to do what I did, melt and temper some chocolate (I used milk chocolate) and when the chocolate is relatively cool, dip the marshmallows into it and coat evenly. Leave to set. Dunked in milk chocolate, the marshmallows taste like little bites of hot cocoa :)

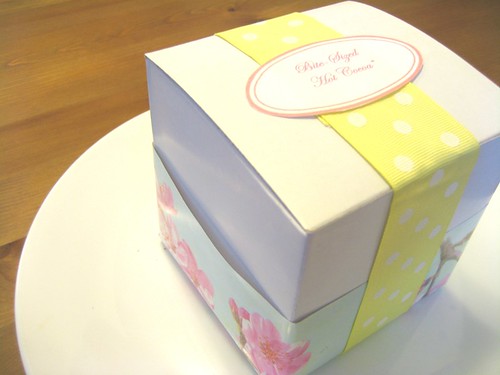
(A rushed wrapping job :p )

Finally, box them up real nice and give to the ones you love! Happy spring to everyone!

Wednesday, March 5, 2008

If You're Not Careful, It Could Take a Whole Day

So, Amy decided to turn 20 a few days ago. How could I NOT bake for her?? On Monday, I got out of class, ran over to Ralph's to get some last-minute provisions and got to work.
2:00pm.

Consulting Donna Hay was a must. I had big plans for this "project" (I happen to like Amy. A lot). I started by making the "bases" - a chocolate cake and a yellow cake. Basic basic basic stuff - into the oven, 25 minutes. Cool down. You know the drill. These were then cut into small rounds - 2 rounds to a cakelet: sandwiching a layer of icing (cream cheese icing for the chocolate cake, dark chocolate ganache for the yellow cake). It was in the next step that I realized I should probably get a palette knife. Icing cakes can be a back breaking job.

A formidable army of bears and bunnies <3


Since this was to be a baking "excursion", I thought I'd try my hand at marzipan. I personally hate the taste of that stuff...but it works well for decorative purposes. After a few trial-and-errors (aka. a lot of deformed bunnies), I came up with a somewhat-uniform bunny model. I got a little better when it came time to make my marzipan bears.

So the finishing touch: a bunny for each chocolate cake and a bear for each yellow cake!!

Of course, A LOT of room for improvement. Don't worry - I'll get it someday.

12:00am. Oh shit. Time flies!!

Wednesday, December 26, 2007

It's Cold Outside

I hate crowds. HATE them.

So you can only imagine what I felt when Bernard and I walked into Hop Li (proper and full review to come soon) to see forty people crammed up against the front counter. It was absolutely horrible. We waited for over half an hour without even being able to get so much as our names down on the waiting list.

OK, I admit it…it was stupid of me not to make reservations on Christmas night. Really stupid. But still, it was ridiculously crowded! Eventually, we decided to get a take-out order to bring back home instead. It's no wonder Hop Li was crowded, the food is amazing.

After dinner, I made a quick dessert with what scraps of supplies I had lying around the house. I decided to make a batch of Dorie Greenspan’s Korova cookies. Now, I’ve made these before and know that this recipe produces amazing cookies but still, to me, cookies don’t really make a satisfying after-dinner dessert. To get around this problem, instead of making a batch of small cookies, I made two large cookies and served each one with a scoop of ice cream and Christmasy sprinkles (the recipe is below).

The recipe didn’t fail me – the cookies turned out great. The only problem was that, since the cookie is naturally REALLY crumbly (which is one reason why the cookie is so good), it becomes really difficult to remove from the baking sheet in one piece when it’s one huge cookie. One cookie broke into pieces when I tried to put it onto a plate…but it didn’t matter – it still tasted great. The crumbly texture also makes it perfect for eating with a spoon (which we needed to do since I added a scoop of ice cream on top!) I also used white chocolate chunks in my cookies instead of dark chocolate…just because I love white chocolate :)

Good food, no crowds. Merry Christmas.

(Yes, I KNOW fortune cookies are un-Chinese...but they taste fucking great!! I could eat a whole bag of those. My fortune this time said "The world will soon be ready to receive your talents". Awesome, now I just have to find a talent for the world to receive)

--

Korova Cookies (ingredient quantities makes 2 large cookies…and you’ll have dough left over for about 4 normal sized ones)

156ml all-purpose flour
40ml cocoa powder
1/4 teaspoon baking soda
5 ½ tablespoons unsalted butter at room temperature
1/3 cup light brown sugar
1/8 cup sugar
1/4 teaspoon fleur de sel
1/2 teaspoon vanilla extract
2.5oz white chocolate chunks

Beat butter in a large bowl until light and creamy. Add the sugar, brown sugar, fleur de sel and vanilla extract to the butter and beat until combined. In a separate bowl, sift together the flour, cocoa powder and baking soda. Add this to the butter mixture and mix until just combined. DO NOT overmix…don’t worry if the dough seems really crumbly – that’s what it’s supposed to be like (I know, the first time I made these, I was sure I had made a mistake somewhere since the dough seemed way too dry and crumbly). Add in the chocolate chunks and give it a quick mix to distribute it into the dough. Dump the dough onto a large piece of cling wrap.
Here, Greenspan’s recipe says to roll the dough into a log and wrap in cling wrap but I’ve found that it is next to impossible to roll the “dough” into any shape since it has the texture of sand (no joke). So, instead, when you have the mixture on the cling wrap, wrap it tightly and compress the dough into a ball shape with the cling wrap. Then, gently press and mold the “ball” into a long roll shape with roughly a 1.5” diameter (it’s hard to describe but you’ll get the hang of it when you start making them). Usually, my “roll” ends up looking like some type of slug but that doesn’t matter. Throw the dough, wrapped in cling wrap, into the fridge and chill for at least 30 minutes.

Take the dough out of the fridge and let it sit for about minute. Preheat the oven to 325F and line a baking tray with greaseproof paper. How you divide up the dough depends on the size you want your cookies to be. For normal sized cookies, you can slice the dough to about ½” thick. For my big cookies, I split the dough into thirds, with each third making one big cookie. The dough will probably crumble when you slice it up but you can just press the pieces together and press it into a circle shape on the baking tray. Bake the cookies on the center rack for around 12 minutes. The cookie centers will be soft but the edges should be done. Cool on racks…DO NOT touch or attempt to remove (especially the big cookies) until it cools for a bit. The cookie will firm up as it cools so if you attempt to remove from the tray before it cools, it will just break into pieces.

Place a large cookie on each plate. Scoop your favorite ice cream on each cookie and add sprinkles!!

(Large Cookie with triple fudge ice cream!)

--
I've been baking like crazy over the last week...making gifts to send out to friends and such. And with the end of Christmas comes the end of my Christmas gift making spree. Now let's bring on 2008!!
(Sugar cookies decorated with royal icing. These made their way to Vegas!)
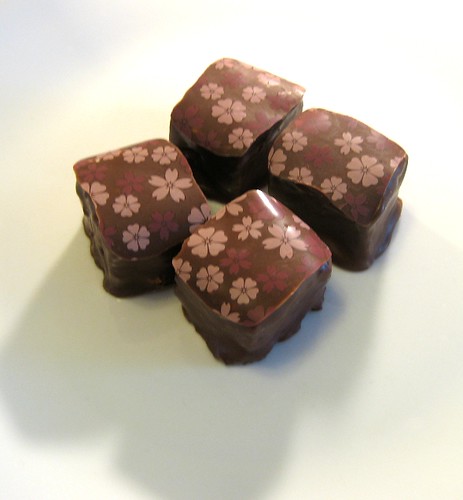
(Dark chocolate-hazelnut truffles)